
A leaking roof can turn your cozy home into a soggy mess in no time. The sound of dripping water might seem like a minor annoyance at first, but don’t be fooled—left unchecked, those leaks can lead to significant damage and costly repairs. Whether it’s an unexpected storm or just the wear and tear of time, knowing how to maintain your roof is essential for preserving the integrity of your home.
Understanding what causes leaks and how to fix them will save you both stress and money down the line. Regular maintenance not only extends the life of your roof but also keeps it looking great. Ready to get started? Let’s dive into some essential steps for keeping that roof leak-free!
Identifying the Cause of a Leaking Roof
guide to repairing a leaking tile roof is by identifying the cause of a leaking roof is crucial for effective repair. Start by inspecting your attic or upper floors after heavy rain. Look for signs of water stains, mold, or dampness on ceilings and walls.
Common culprits include damaged shingles. Curling, missing, or cracked shingles can allow water to seep underneath them. Also check flashings around chimneys and vents; if they’re loose or rusted, leaks are likely.
Pay attention to gutters as well. Clogged gutters can overflow and direct water toward your roof’s edges rather than away from it.
Consider other factors like age and weather conditions that may have weakened your roof over time. A thorough examination will help pinpoint the source of those troublesome leaks before they escalate into larger issues.
The Importance of Regular Roof Inspections
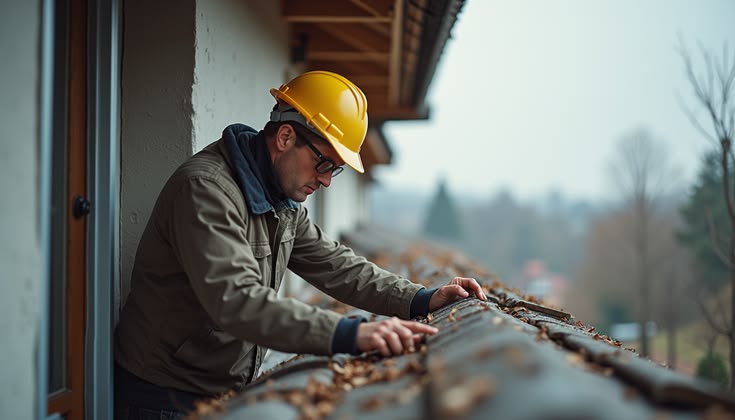
Regular roof inspections play a crucial role in maintaining the integrity of your home. Roofs endure various weather conditions, and over time, wear and tear can lead to serious issues.
Scheduling routine checks helps identify potential problems before they escalate. Catching small leaks or damaged shingles early can save homeowners significant repair costs down the line.
Moreover, regular inspections ensure that your warranty remains valid. Many manufacturers require proof of maintenance to honor claims related to roofing problems.
Additionally, a well-maintained roof enhances energy efficiency. By addressing minor leaks or insulation gaps promptly, you keep heating and cooling costs manageable.
Peace of mind comes from knowing that your roof is in optimal condition. This proactive approach allows you to focus on other aspects of homeownership without the looming worry of unexpected repairs.
DIY vs Professional Roof Maintenance
When it comes to roof maintenance, homeowners often face a critical choice: DIY or hire a professional?
DIY projects can be rewarding and cost-effective. You gain hands-on experience and save money on labor costs. With the right tools and materials, many minor repairs are manageable. You might even enjoy the satisfaction of fixing things yourself.
However, there are risks involved. Without proper knowledge, you may overlook potential problems or cause further damage. Safety is also a concern; roofs can be precarious places for untrained individuals.
On the other hand, professionals bring expertise to the table. They know what to look for and how to handle complicated issues efficiently. Their experience can lead to long-lasting solutions that prevent future leaks.
Weighing your skills against your budget will guide your decision in maintaining your roof effectively.
Materials and Tools Needed for Roof Repair
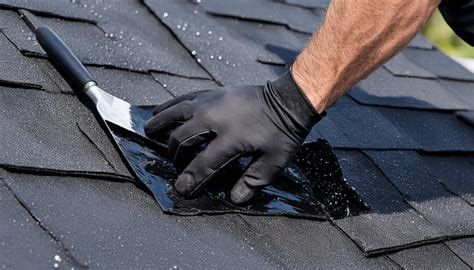
When tackling a leaking roof, having the right materials and tools is crucial. Start with roofing cement or sealant for patching small holes. This can provide an effective temporary fix.
Next, you’ll need roofing shingles that match your existing roof. These are essential if larger sections require replacement. Don’t forget about flashing to divert water away from vulnerable areas like chimneys or vents.
Gather basic tools as well—such as a ladder, utility knife, and hammer. A pry bar can help remove damaged shingles easily without causing further harm.
A caulking gun is also beneficial for applying sealant precisely where it’s needed most. Safety gear is important too; gloves and goggles protect against sharp edges and debris while working on heights.
With these items in hand, you’re ready to address that leak effectively!
Step-by-Step Guide to Fixing a Leaking Roof
When it comes to fixing a leaking roof, following a clear step-by-step guide can make the process less daunting. Start by ensuring your safety. Wear appropriate gear such as non-slip shoes and a sturdy harness if you are working on a steep roof.
First, assess the damage from both inside and outside. Look for water stains or mold in your attic or ceilings. These signs often point directly to where the leak is originating. Next, inspect your roof thoroughly for missing shingles, damaged flashing, or cracks around chimneys and vents.
Once you’ve identified the problem areas, gather your materials and tools: roofing cement or sealant, replacement shingles (if needed), a putty knife, caulking gun, ladder, and possibly a nail gun for securing new shingles.
Begin with minor repairs like sealing small cracks with roofing cement using the putty knife. For larger issues like missing shingles, remove any debris from around the area before replacing them. Slide new shingles under existing ones to ensure water flows over them properly.
After completing repairs, test for leaks during rain or use a hose to simulate rainfall on different parts of the roof while checking inside for leaks again.
Regularly monitor these repaired spots over time to catch any further issues early on. Keeping up with this maintenance not only prolongs your roof’s life but also protects your home from significant damages down the line. With patience and attention to detail, maintaining your roof can be manageable—and rewarding too!


